3RD TERM

Junior Secondary Class 2
admin
Site Admin
Posts: 1
Joined: Thu Oct 16, 2025 5:08 pm

Week 10

Post by admin »

TOPIC: BODY MEASUREMENT
CONTENT: 1. Measurement- Body parts to be measured
2. Guidelines for taking body measurement.
3. Taking Body Measurement.


SUB-TOPIC 1: BODY PARTS TO BE MEASURED.
In fashion designing, Body measurement is a process by which a tailor or seamstress takes the length or width of the parts of the body to be covered by the garments he or she wants to construct. It is necessary to take accurate body measurement before the fabrics are cut. Accurate measurement is done with a tape measure usually marked with centimetres.
Image

IMPORTANCE OF BODY MEASUREMENT:
i. Accurate measurement helps to make a suitable, fitting dress instead of a tight fit or over-size.
ii. It helps to determine the amount of material actually needed for sewing a dress.
iii. It enables the tailor or seamstress to reduce wastage of material when cutting and sewing.
iv. It helps to avoid waste of time in re-cutting of fabrics after it might have been tacked or sewn.

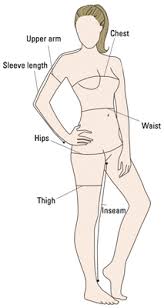
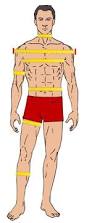
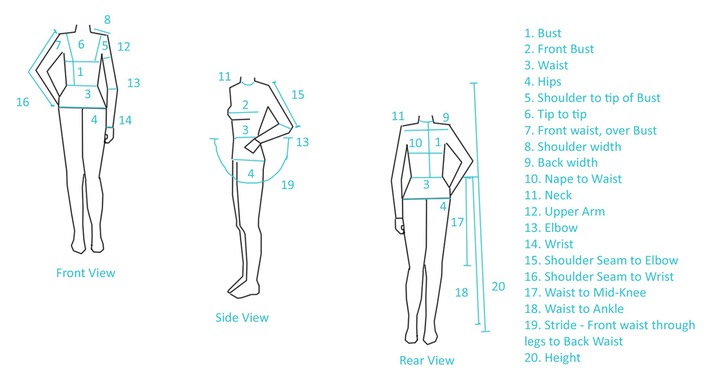
PARTS OF THE BODY TO BE MEASURED:
i. Bust: Measure round the fullest part of the chest.
ii. Waist: Measure round the smallest part of the trunk.
iii. Hip: Measure round the largest part of the body below the waist.
iv. Arm: Between the shoulder and the hand.
v. Back width: Measure the width of your back.
vi. Length of the back: Measure from base of the neck (nape) to the waist.
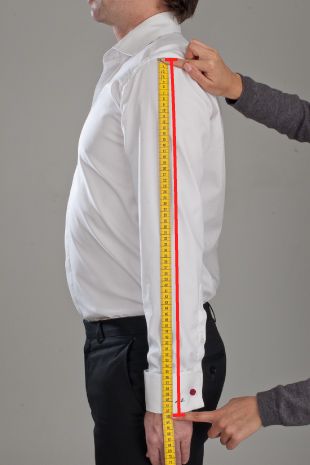
vii. Sleeve length: Measure from point of shoulder to elbow and elbow to wrist bone. The elbow should be slightly bent.
viii. Wrist: Measure between the hand and the arm.
Image


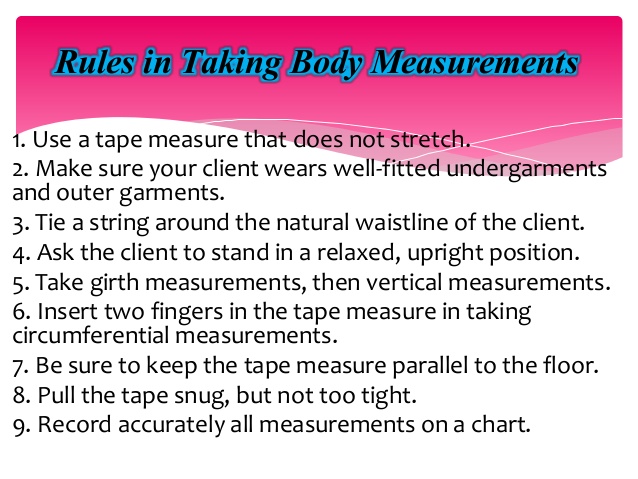
SUB-TOPIC 2: GUIDELINES FOR TAKING BODY MEASUREMENT
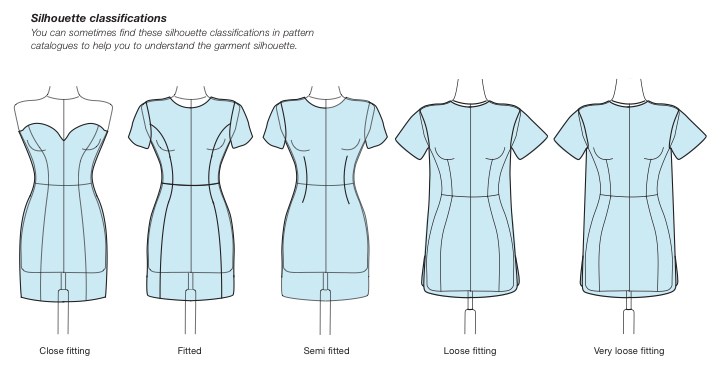
1. Take measurements over close-fitting garments. Wear flat shoes.
2. For accurate measurements, ask a friend/classmate to take your measurement.
3. Measure accurately. Avoid adding or taking from the actual body measurements.
4. Record each measurement as soon as it is made.
5. Use a tape measure that does not stretch.
6. Body measurements should not be too loose or tight.
7. Stand well or adopt a good posture when taking body measurements.
Image
Image

EVALUATION:
i. Mention 5 parts of the body to be measured.
ii. State three guidelines for taking body measurements.

[youtube]https://www.youtube.com/watch?v=HGepcoSTxpc[/youtube]

ACTIVITIES: i. Take the measurements of your friend. Let your friend also take your own measurements.
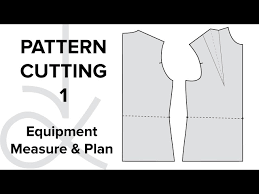
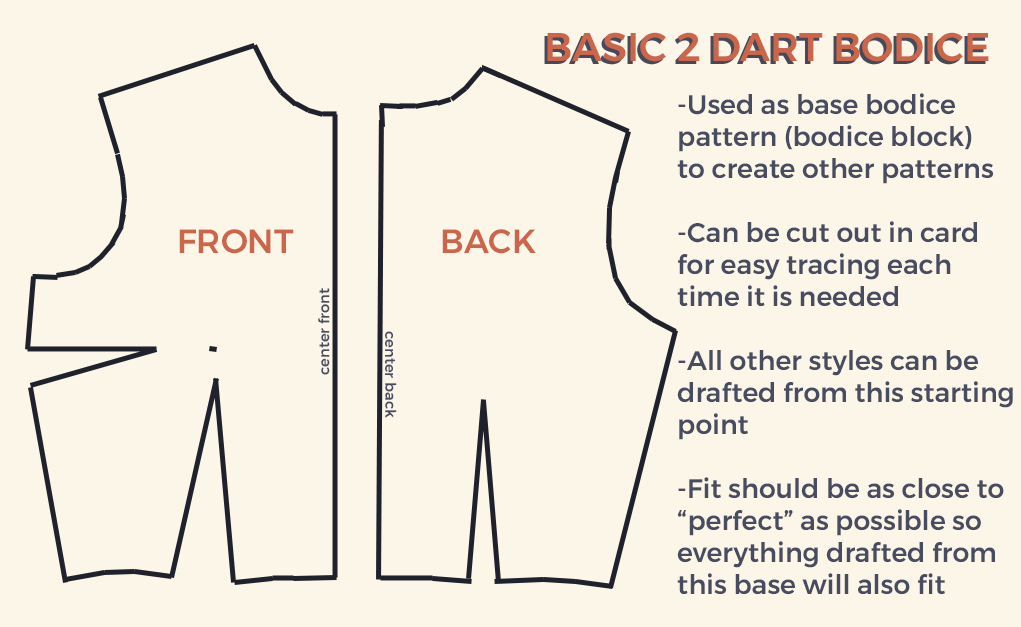
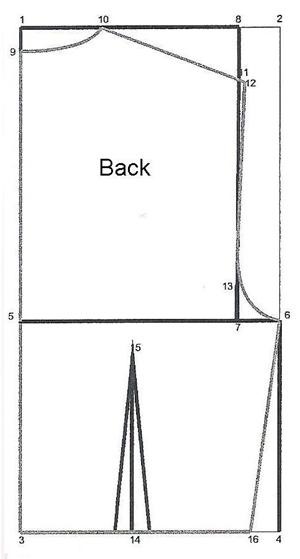
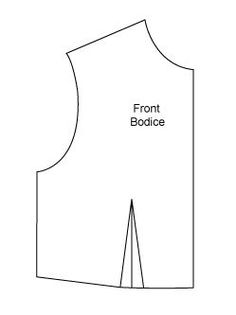
Ii. Draft your own front and back bodice block patterns.

READING ASSIGNMENT:
Popoola, O.O.(2006) Home Economics New concepts for JSS Book 2, pages 116 – 119.


SUB-TOPIC 2: TAKING BODY MEASUREMENT
MATERIALS FOR TAKING BODY MEASUREMENT: The following materials are needed for taking body measurements:
i. Tape measure
ii. Pencil or biro for writing the measurements.
iii. Long ruler
iv. A note book for recording the measurements
v. Set square
vi. Metric ruler and T-square
vii. A string to be tied around the natural waist line.
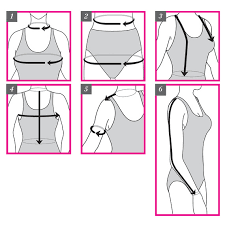
Image

BODICE:
BUST: Take the measurement around the largest part of the bust, keeping the measuring tape well under the arms. Make allowances as follows:
*5cm-8cm for dress
*10cm for a blouse
*5cm for underwear
*16cm for a night dress
Chest width: Take this measurement 10 cm below the shoulder line, from armhole to armhole.
Front length: This is taken from neck end of the shoulder to centre front of tape or string tied around the waist.
Across back: This is taken across the back from where the sleeves are set in 10cm below nape or back width.
Back length: This is taken from nape to centre back of tape or string around the waist.
Shoulder: Measure shoulder length from base of neck to arm socket.
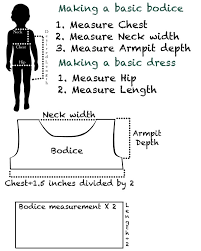
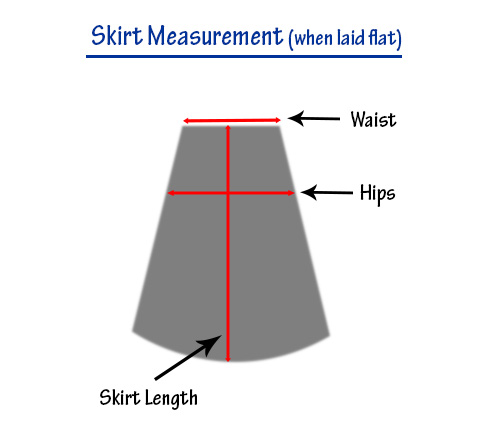
Image

SKIRT:
Waist: Measure waist circumference round the natural waist line. Give enough allowance for ease in wearing finished garment.
Hip: Measure the widest part of the body below the waist.
Skirt length: Measure from waist to knee / hem.
Image

SLEEVES:
Upper arm circumference: With arm bent and placed on the waist, measure around the fattest part of the upper arm. Arm length (shoulder to wrist): With arm bent, measure from arm socket over elbow to wrist bone.
Wrist circumference: Measure around wrist below wrist bones.
Hand circumference (cuff): Touch thumb to little finger then measure at the position of greatest circumference.
Image

[youtube]https://www.youtube.com/watch?v=Np1HzrdDvHM[/youtube]

EVALUATION:
1. ..................are needed for taking body measurement.
(a) Tape measure and fork (b) pencil and dictionary (c) tape and table (d) tape measure and note book
2. Explain the procedure for measuring the following:
i. Bust
ii. Waist
iii. Hip

ASSIGNMENT:
1. Popoola, O.O.(2005) Work Book on Home Economics New concepts for JSS Book 2, page 28.
2. Draw a human body and label the parts to be measured before making a gown.
admin
Site Admin
Posts: 1
Joined: Thu Oct 16, 2025 5:08 pm

Week 11

Post by admin »

TOPIC: BASIC PATTERN DRAFTING
CONTENT: 1. Basic pattern drafting tools and equipment.
2. Drafting basic bodice and skirt patterns.


Sub-Topic 1: BASIC PATTERN DRAFTING TOOLS AND EQUIPMENT

PATTERNS : for clothing construction are shapes of garment parts, cut out of paper. Pattern drafting is an art that requires good imagination and plenty of practice.
Image

USES OF PATTERNS IN GARMENT CONSTRUCTION
1. Patterns are used to direct or guide the cutting of fabric.
2. They prevent serious mistakes in dress making.
3. They prevent waste of time in dress making.
4. They prevent waste of fabric and make sewing easy.
5. They reduce trial and error in sewing.

TYPES OF PATTERNS
There are basically two types of patterns: the drafted and the commercial patterns.
i. Drafted pattern: This is made to fit a particular person. A person’s body measurements are first taken, then the pattern is drafted to fit his/her size.
ii. Commercial patterns: These are designed and made by experts to fit standard figure types using specific body measurements. They are available in different sizes. They are sold in special pattern envelopes.

TOOLS AND EQUIPMENT FOR PATTERN DRAFTING
The tools that are needed for Pattern drafting include:
1. A metre rule: This is used for drawing lines.
2. Tape measure: This is for measuring on the paper.
3. French curve: Used for shaping curved areas.
4. Pencil: Used for writing and drawing lines on the drafting paper.
5. Paper scissors: Used for cutting the drafting paper.
6. Eraser: used for cleaning wrong lines or drawing.
7. Brown paper: Patterns are transferred from cardboard sheet to brown paper.
8. Cardboard sheet: Patterns are made on cardboard sheet.
9. Pins: This is used for holding card board and brown paper.
10. Table: Brown papers or cardboard sheet are placed on the table for drafting.
Image

EVALUATION:
State the uses of the following equipment in pattern drafting:
i. Table
ii. Cardboard
iii. Scissors
iv. French curve
v. Pencil

[youtube]https://www.youtube.com/watch?v=0WVOhnq1cro[/youtube]

READING ASSIGNMENT:
Popoola, O.O.(2006) Home Economics New concepts for JSS Book 2, pages 116 – 129.


SUB-TOPIC 2: DRAFTING BASIC BODICE AND SKIRT PATTERNS
Pattern drafting involves two stages:
(i) Block patterns
(ii) Adaptation of the blocks to the required styles.

BLOCK PATTERN is the basic or foundation pattern. The basic or foundation patterns often drafted are bodice, skirt and sleeve. They are drafted to the exact size of the body. They can be adapted or modified to any desired style.
Image

DRAFTING BASIC BODICE BLOCK
Back bodice block:
Image

1. Take the necessary body measurements: Length of back (bodice), Bust.
2. Measure AB = Back length + 1.25cm
3. Measure BC = ¼ Bust measurement.
4. Draw the rectangle ABCD.
5. Mark E = mid- point of AB, Extend to F.
6. Divide the upper part of the rectangle AEFD into equal 16 small squares and mark K and H.
7. Measure out the following:
i. A to G 2cm for back neck
ii. H to 12cm for shoulder level
iii. J to C 2.5cm for waist line drop.
8. Using a broom stick or French curve, join the following carefully:
i. GK for back neckline
ii. KI for shoulder level
iii. IF for armhole
iv. FJ for side seam
9. Cut out the back block.


Front Bodice Block:
Image

1. Measure AB=Back length + 5cm
2. Measure AD= ¼ Bust measurement + 2.5cm.
3. Complete the Rectangle ABCD
4. Mark FE= ½ AB (½ back length + 2.5cm)
5. Join EF to form AEFD= ½ ABCD
6. Divide AEFD into 16 small squares and mark K and H
7. Measure out the following:
i. A to G 4cm for front neck.
ii. H to 12cm for shoulder level
iii. J to C 2.5cm for waist drop.
8. Carefully join GK, KI, IF and FJ as for the back bodice.
9. Cut out the front block.

DRAFTING BASIC SKIRT BLOCK
Required measurements:
i. Hip
ii. Waist
iii. Length (waist to hem)

Back Skirt Block:
1. Take the necessary measurements.
2. Measure AB=Length (waist to hem) + 2.5cm
3. Mark AC = 20cm
4. Draw horizontal lines from A, C and B.
5. Mark C – D = ¼ hip measurement minus 1.25cm.
6. Mark A – E = CD
7. Join DE.
8. Mark F 2.5cm from E (side seam)
9. Join FD using a broom stick.
10. Mark AG = 2.5cm.
11. Using a broom stick or French curve, join GF
12. Join GB (centre back).
13. Measure G – H =about 7.5cm or according to figure.
14. Draw a perpendicular line from H to CD
15. Draw the dart about 2.5cm wide and about 12cm long.
16. Mark B-I= ¼ measurement of required width of skirt at hem minus 1.25cm.
17. Mark I-J =about 3cm
18. Draw BJ for hem line.
19. Join DJ

Front Skirt Block:
1. Take the necessary measurements.
2. Mark A – B = Length from waist to hem + 2.5cm.
3. Mark A – C = 20cm.
4. Draw horizontal lines from A, C and B.
5. Mark C – D = ¼ hip measurement +2.5cm.
6. Mark E and join to D.
7. Mark F 2.5cm from E.
8. Join F D for side seam using a broom stick.
9. Mark A – G = 2.5cm.
10. Join GF using a broom stick (waist line).
11. Join GB for centre front.
12. Mark GH = about 9cm (or according to figure).
13. Drop perpendicular line from H to CD.
14. Draw the dart (at least 2.5cm wide and about 12cm long).
15. Curve skirt hemline as for Back skirt.
16. Join D J.
Image

ADAPTATION OF BLOCK PATTERNS: The Back and Front bodice blocks drafted can be used to prepare patterns for simple garments. This is called Pattern Adaptation. The style pattern you will produce must have seam allowances and other pattern marks. Pattern adaptation is the process of using the master card to develop various styles.
Image

EVALUATION:
1. Differentiate between drafted and commercial patterns.
2. What is Block pattern?
3. Patterns can be..............to any style.
(a) Cut (b) adapted (c) removed (d) sewn

ACTIVITIES:
1. Draft your own front and back bodice block patterns.
2. Use the blocks to produce a simple blouse pattern or a shirt pattern of your choice. Put all pattern markings. Prepare the facings.
3. Make yourself a simple blouse or shirt using the pattern you have drafted.

[youtube]https://www.youtube.com/watch?v=bcWII_uH5uc[/youtube]

ASSIGNMENT:
1. Popoola, O.O.(2005) Work Book on Home Economics New concepts for JSS Book 2, pages 29 -30.
2. The basic pattern drafted to the exact size of the body is called a..................
(a) Needle (b) fashion (c) block (d) sewing
3. French curve is used for............................
(a) shaping curve (b) joining curve (c) adding curve (d) cleaning curve
4. The use of one of the following prevents serious mistakes in dress making:
(a) Styles (b) Fashion (c) Stitches (d) Patterns
admin
Site Admin
Posts: 1
Joined: Thu Oct 16, 2025 5:08 pm

Week 12

Post by admin »

REVISION
Post Reply

Return to “JSS 2”